

Advanced Mode User Guide
Website functinalities
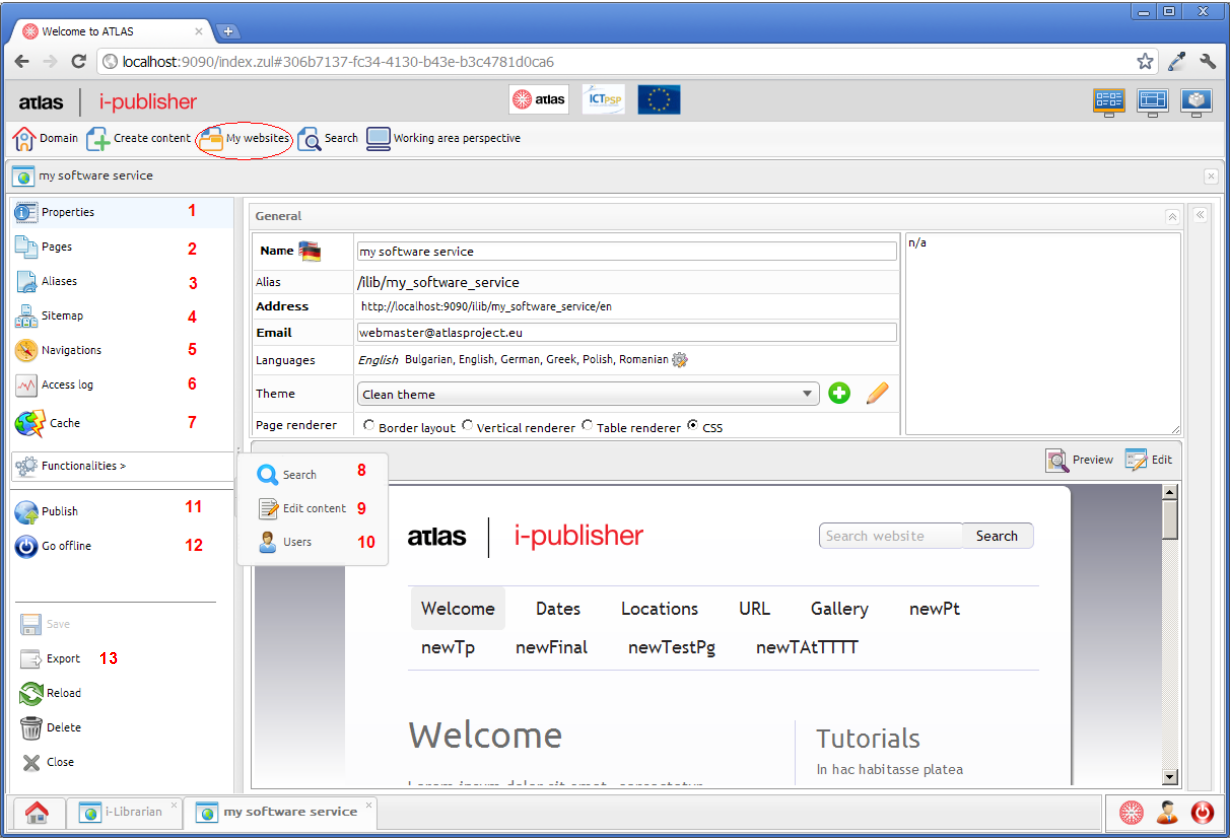
The picture above shows the website editor. Through this editor you can configure your website and its fuctionalities. There is a circled button – “My websites”. After clicking on this button, a list of all your websites opens and you can select any one of the for editing (and open its editor) or create new one. This can also be done from “My websites” area in the “Welcome perspective”.
-
In the picture above you can see the “Properties” tab opened. Here you can see a preview of the home page of your website and edit its general properties.
-
In the “Pages” tab you can see a list of all pages in the current website. You can edit existing pages or add new one.
-
In the “Aliases” you can see a list of all aliases defined for the selected website. You can edit an existing alias or add new one.
-
In the “Sitemap” area you can define where (to which page) the links from a certain widget lead to. There are options:
-
“Default” sitemap – define where the links from a certain widget would go regardless of the widget's original page or content.
-
“Advanced” sitemap – you can define different target page for each content type the widget is configured to display, including the related ones. In addition different target pages can be defined for one and the same widgets but placed in different pages.
-
-
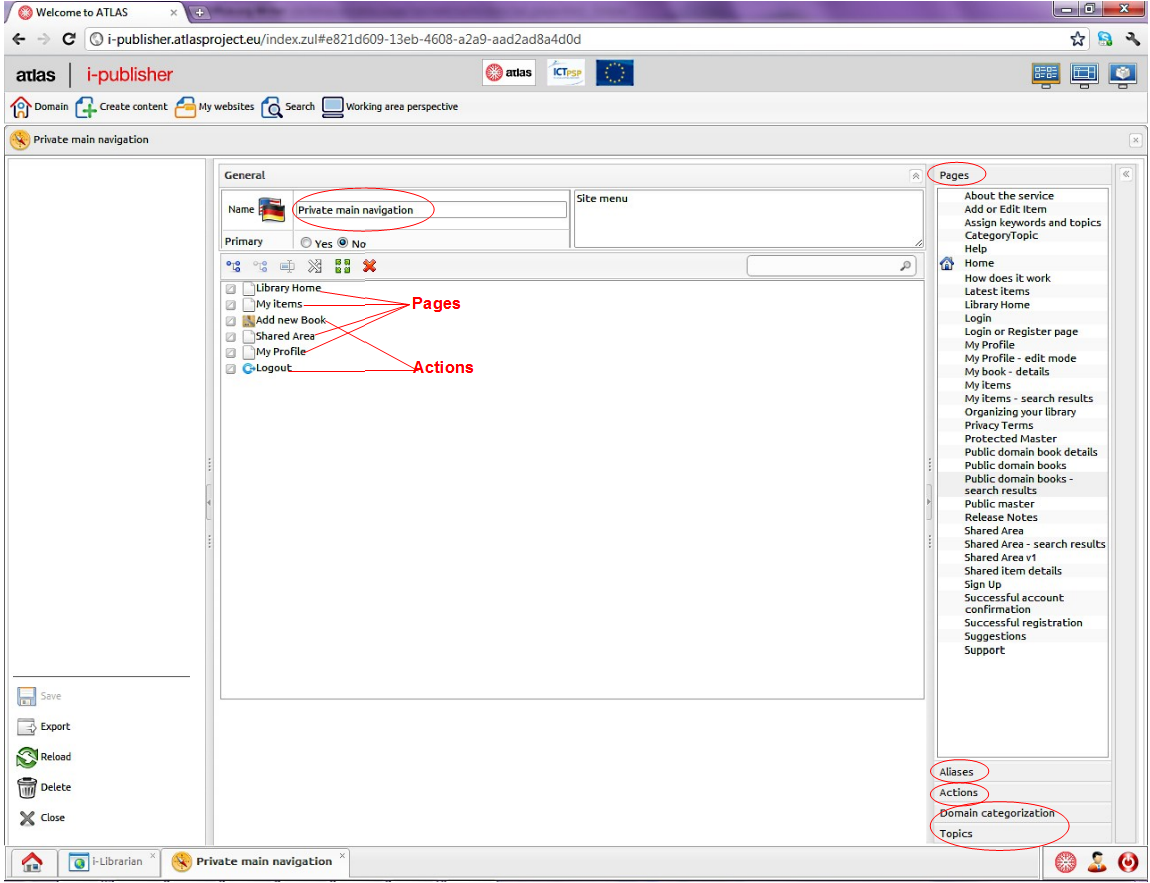
In the “Navigations” tab you can see a list of all navigations created for the selected website, edit existing navigations or add new ones.
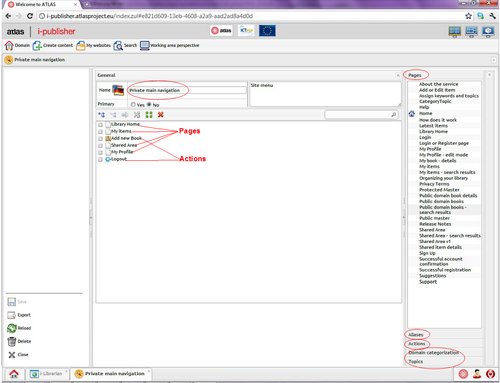
In the picture above you can see how the navigation editor looks like. The currently edited navigation is named “Primary main navigation”. To the right is the palette. You can see the “Pages”, “Aliases” and “Actions” tabs. There are two categorization trees defined for the current domain - “Domain categorization” and “Topics”. You can explore the trees in the last two tabs and include categorization nodes in your navigation if you want.
-
To record statistics about the popularity of your website you can use various online analytic services. Each of them would give you a Java Script code to be included in your website. Paste this code here in the “Access log” area.
-
In the “Cache” area you can configure your website's cache. When the cache is enabled, your pages will be cached which makes the site faster. Nevertheless, sometimes changes in the website's content (especially the dynamic content) may not lead to clearing the cache and you may see old information no matter how many times you refresh the browser. In such cases you have to manually clear the cache by clicking on the “Clear cache” button.
Functionalities:
-
“Search” – Configure whether, when and what part of your dynamic content will be indexed, i.e. is searchable. Some static content is searchable by default.
-
“Edit content” – define what kind of items ( from which content types ) your website's users would be allowed to create/edit and how the content item form would be organized.
-
“Users” – manage your website's users.
Website actions:
-
Publish – make your website accessible on the internet
-
Go offline – forbid external access to your website. You can define what you want your website's users to see instead of the requested page. This can be either a fixed text, for instance “Down for maintenance”, or a selected page.
-
Export – unlike other entities, each website can be exported both as website or as theme (in the terms of Simple mode). The main difference between an exported website and exported theme is that for themes there is no content model defined.
ATLAS (Applied Technology for Language-Aided CMS) is a project funded by the European Commission under the CIP ICT Policy Support Programme.